Floorcare guides
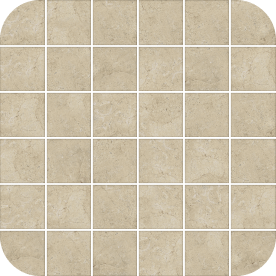
How to clean a Limestone floor
The ultimate guide to Cleaning and Polishing a Limestone Floor
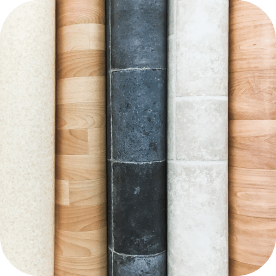
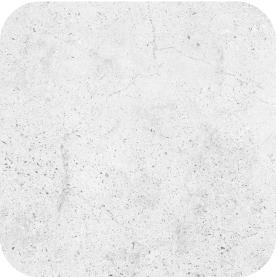
Limestone floors can add unique beauty and warmth to any environment, but keeping them looking their best requires some special care. When treated correctly, a Limestone floor is a durable and long-lasting natural stone flooring, however when improperly maintained, limestone floors can quickly look dull or even scratched.
At Victor Floorcare, a UK manufacturer of commercial cleaning equipment, we have helped thousands of customers keep their limestone floors looking pristine. In this guide from our team of floorcare experts, we will teach you how to clean limestone tile and grout to remove stains and prevent damage. You’ll learn about limestone floor cleaning best practices, what supplies you need, mistakes to avoid, and our pro tips for stain removal and daily maintenance.
1. What are the levels of damage that limestone flooring can experience?
Even though it’s one of the most durable types of floor tiles, limestone can incur different levels of damage, most of which can either be fixed through a detailed cleaning process or a restoration undertaking.
Scuffs and markings
Scuffs happen mostly due to furniture or other heavy objects being pulled across the floor, but rolling wheels (like on your vacuum) with small pebbles attached across the floor surface can also cause deep scratches.
Limestone tile should have a layer of sealer on top that helps protect scuffs from happening, but sometimes sealer can wear down due to someone using the wrong kind of cleaning products on it. Floor products with labels such as “all purpose” or “multi-purpose” sometimes have harsh chemicals that can remove the sealer.
We’ll talk about the right kind of floor cleaners to use for your limestone floors later in this article.
Soil absorbent
Another type of damage that can occur is due to soil or spills. In this case, the sealer (which also protects against spills) wears out making the tile vulnerable to messes. Limestone is very pores, similar to a sponge, so it retains spills which make it impossible to “surface” clean, and can lead to permanent damage.
The great thing about limestone tile is that restoring it back to normal is easy to do when you follow the steps provided in this guide carefully.
Tile or grout breakage
While limestone is one of the top most durable tiles, it can still crack under tremendous sudden weight such as a bowling ball dropping or a box of books. Grout can also break apart into pieces too if not properly sealed (or if the sealant has worn away).
How to handle broken tile and grout
If the tile is broken or cracked, you’ll need to hire a professional floor repair person to install a new piece. Again, the great thing about limestone is that it’s easy to replace, so if one tile breaks, there’s no worry about having to replace the entire floor.
All cleaning and restoration methods that we teach you in this guide will help you remove permanent scuffs and scrapes from your tile, as well as deep embedded soil and spills.
Let’s begin preparations for the process we’ll use for removing these types of damage from your limestone tile.
2. What precautions do you need to take before starting your floor restoration?
Before starting the cleaning and restoration process, make sure to complete the following safety procedures:
Keep area properly ventilated
Because we won’t be using harsh chemicals to restore the limestone, the ventilation is more to help the dry time during both the cleaning steps and sealant steps. If you’re in a house, open a couple of windows. If it’s a commercial cleaning, setup a fan to help move the air around.
Start later in the evening so dry time happens over night
This is especially beneficial if this is a house project. You don’t want anyone walking on the tile after the sealant has been added, so applying it after dinner later in the evening will help avoid foot traffic on the tiles.
Use proper caution signage
If this is a commercial job, make sure you use appropriate caution signage letting people know the floor is wet.
Wear closed tip work shoes
Use good work shoes that are closed tips and comfortable to work in. You’ll be standing for a long time.
How much time does it take to restore limestone tiles?
As a general rule of thumb, the estimated time to clean and restore limestone for a residential home is approximately 16 hours for 1,000 sq (including moving furniture and dry time) which equates to about 1 minute per square foot. So if you’re restoring the limestone in a kitchen under 90 sq, plan on at least 1.5 to 2 hours.
The estimated restoration time for a commercial floor is much less, about 4 hours for 1,000 sq, (excluding moving furniture and considering that most commercial spaces have open floor plans).
3. What machinery and products will you need before starting?
Limestone Tile Cleaning
If you’re just doing tile cleaning, then you’ll only need the following equipment and products (keep in mind that cleaning alone won’t remove scratches from tile, however removing dirt from scratches will make them less visible).
- Victor Contractor 400 Rotary Floorcare Machine and the 15Ltr Quick Release Solution Tank (primary cleaning equipment). We recommend 180 – 240RPM for scrubbing tasks.
- 15" Red Buffing Floor Pads
- Victor WD60 Wet & Dry Vacuum for soiled water removal
- Prochem Stone & Tile Cleaner
- Miracle 511 Porous Plus Penetrating Sealer (for resealing tile after cleaning)
- Microfiber mop system
- Shoe covers
The Victor Multispeed is ideal deeping cleaning soil and scuffs out of the limestone. It’s dual speed setting makes it ideal for both scrubbing, and later on, polishing Limestone. Some cleaners will use a floor squeegee to remove dirty water off the floor, but we don’t recommend this. Floor squeegees move dirty water across the floor and can seep back into the tile and grout. Instead we recommend using a wet & dry vacuum. Instead of transporting dirty water across the floor, it immediately sucks it up where it's at.
Limestone Tile Restoration
Restoration will focus on not only cleaning the tile, but also fixing blemishes and scratches on it. For this process, we’ll need a different set of equipment that will help us carefully grind the limestone without damaging it while also removing scratches.
If you plan on doing a lot of tile restoration along with cleaning, we recommend investing in this list of equipment over the
- Victor Trojan Slow Speed Rotary Machine and the 15Ltr Quick Release Solution Tank (primary cleaning equipment)
- Diamond pads (for cleaning and grinding)
- Victor WD60 Wet & Dry Vacuum (soiled water removal)
- Prochem Stone & Tile Clean (optional - can be substituted for hot water)
- Miracle 511 Porous Plus Penetrating Sealer (for resealing tile after cleaning)
- Microfiber mop system
- Shoe covers
4. Getting started: Step-by-step guide for cleaning and restoring limestone floors
In this guide, we’ll walk you through the precise process for both cleaning and restoring the floors. Each process will be different and will require different equipment as specified in section 4 of this guide, so make sure you have the correct products for each process.
Cleaning floors only
Vacuum or sweep floors
If you’re in a small area, use a vacuum floor attachment to remove all excess crumbs and soil from the floor. If you’re working in a large commercial area, use a push broom to do a quick sweep of the floors.
Preparing your machine
Plug your Rotary Machine and make sure the floor pad is securely fitted on the bottom. Connect the Quick Release Solution Tank and fill up with water and mix with the Prochem Stone & Tile Clean (follow manufacturer's recommended doses). The goal is to saturate the floor with a thin layer of your pretreatment solution (don’t overflood the floor).
Ensure that the rotary machines is correctly set to the operatives hight. Make sure you’re able to stand up straight (your knees and elbows shouldn’t have to bend). You always want to make sure that the driveboard is parallel with the floor surface as well.
If you’re doing a large commercial space, start from the back of the room and working your way out and carefully saturating the surface one section at a time.
Do this until the entire area is covered with your pretreatment solution.
Scrubbing process overview
Start from a corner of the room and turn your machine on. We recommend scrubbing along the parameters of the room first. With the machine on, run your scrubber in one direct path alongside the wall trim, cleaning until you’ve completed the full circumference of the room.
Next, go back to the edge of the room and begin scrubbing in forward passes allowing the machine head to make 10 degree sways to the left and to the right. Make sure to take your time scrubbing the tile. If there are some spots that seem more difficult to come up, spend a few more seconds scrubbing that area.
Conduct this process until the entire area has been scrubbed.
Remove excess water using Wet vac
Using your Wet vacuum, start at the back of the room and begin extracting the dirty water from the tile. Make several passes if you need to in order to remove as much of the water as possible.
Seal tile and let dry overnight
Following the direction on the back of your tile sealer bottle, cover the area of tile using your microfiber mop to create a nice even layer on the top. Make sure to follow the dry time specified from the sealant manufacturer.
5. For restoring floors
The process for this will be similar to cleaning, however this time you will use Black Floor pads. These will remove any seal and and scrub the floor. For larger areas, you’ll need several pads.
The difference in this process is that you’ll be using a pad that is designed for grinding down the surface of the limestone, which will remove scratches while also cleaning the tile.
The key is not rushing the process. Limestone restoration should be done carefully with extra passes to remove scars.
Similar to the cleaning process above, once the floor has been scrubbed, use your Wet vacuum, start at the back of the room and begin extracting the dirty water from the tile. When you’re ready to seal the surface, cover the area of tile using your microfiber mop to create an even layer on the top. Make sure to follow the dry time specified from the sealant manufacturer.
Maintaining your limestone floors regularly
The key to getting the most longevity out of your limestone floors is proper and consistent maintenance. Don’t allow soil and dirt to build up before scrubbing them, and never use harsh chemicals when cleaning, as this will strip away your sealants.
Depending on how much traffic your limestone tile gets will also determine how frequently you should clean. Below are some suggested cleaning times depending on the environment you’re working in:
- Use a Victor Sprite 300 for cleaning smaller offices or home use
- For home or professional offices, use the Contractor 400 or Contractor 450 every month
- For small retail stores, use the use the Contractor 400 or Contractor 450 each week
- For medium retail stores use the SD20 Scrubber Dryer Walk behind multiple times per week
- For large areas (over 8,500sqm) SDR-80 Scrubber Dryer Ride On